Creating an e-frame (3)
Par Laurent Riesterer, dimanche 24 avril 2005 à 21:20 :: E-Frame :: #7 :: rss
I will show you how I transform the laptop into a frame.
Step 1: Find a frame
As we will put all the hardware into the frame, we need a thick frame with enough space. I found a wooden frame at Utrecht Art (Collectibles series) which is 1''1/2 thick:

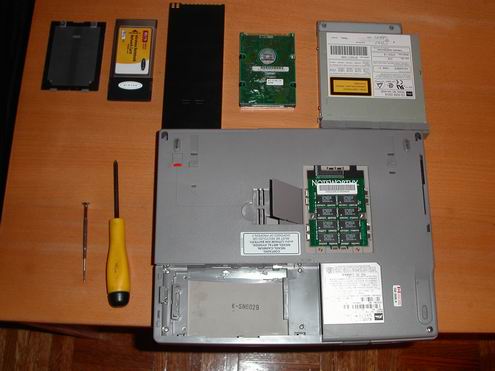
Step 2: Dissassemble the laptop
We can now start to disassemble the laptop. I have taken some photos during the process:

First, remove the keyboard:

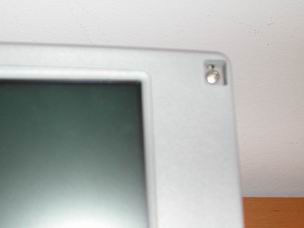
Uncover the hidden screws in the screen bezel, and work on the screen to remove the LCD panel. Some screws holding the screen panel with the main body are not easy to spot: take your time and don't force.


The power adpater:
The batteries (biggest one is security battery, smallest one is CMOS -- on one of my laptop it was dead, but it cost $17 to get a new one so I just need to plug a keyboard to remove the warning message during the first cold boot):

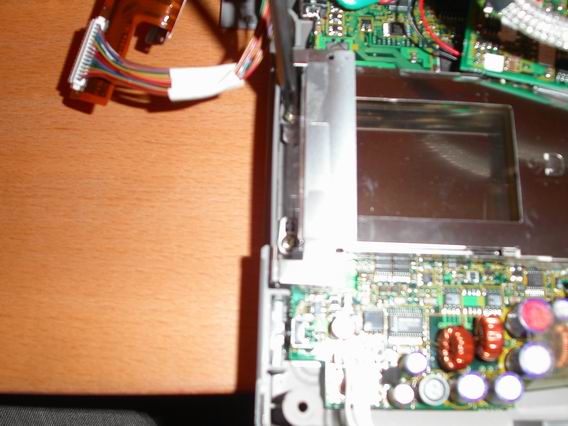
The card with the audio and IDE connector:

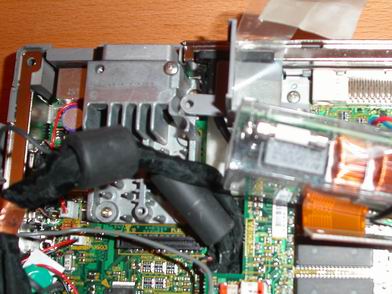
Unplug the video card:

The PCMCIA slots:
I have removed the left part (external VGA + IrDa):


Once all the pieces are ready, just plug the components together and check if the system still work:

Step 3: Pack everything in the frame
First tape the LCD panel to the mat and place it back in the frame:

Put back to motherboard, the video card, the hard drive:

And tie everything with strong tape:

Then put the back cover (don't forget to make a hole to access to the power switch):

Congrutalations ! You have an e-frame. Just boot it the be sure everything is working:

To be continued ...
Next time, I will explain how to put some photos in the frame and how to control the slideshow.
Commentaires
1. Le samedi 3 septembre 2005 à 18:30, par Biokemyst
2. Le lundi 3 octobre 2005 à 13:40, par ennio
Ajouter un commentaire
Les commentaires pour ce billet sont fermés.